Develop a conventional look on a digital canvas with the Mixer brush.
Digital painting tools have seriously advanced within the past few years. Artists will use tablets to supply works of art reception or away, with all the convenience that brings. And it’s additionally become easier than ever to require ancient painting techniques and apply them to the digital canvas.
As a young creator, I’m keen to require the concept of communicatory parts from the previous Masters and portray them in my work as a result of it’s vital to pass away these concepts to a replacement generation of art fans.
I’ve learned the bulk of my painting techniques by learning each the previous Masters and people digital artists whose art stands out from the gang. My favourites square measure John Singer painter and Craig Mullins; you’ll be able to learn loads from learning their work.
Get Adobe artistic Cloud currently
Recently, I received some queries on a way to recreate the planning of associate degree oil painting in Photoshop CC. though many folks suppose the settings on your Photoshop brushes aren’t vital, I still believe that configuring associate degree acceptable tool will facilitate the creator in some ways.
My secret is to use the Mixer Brush tool. Artists will quickly build brushstrokes within the sort of a conventional creator. I’ll be mistreatment the Mixer brush loads in this Photoshop tutorial.
Click on the icon at the highest right of the image to enlarge it.
- Produce line drawings
Rough sketches help you to settle on a good pose
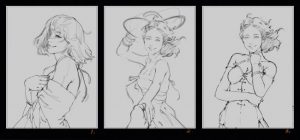
I begin by drawing multiple sketches. These figure poses facilitate American state opt for the simplest one, supported the visual language like composition, form and proportion. during this case, i choose the figure staring at the viewer, in a very a lot of easy cause.
- Build the form of the shadow
The character and background are built up with separate layers
Next, I produce 2 separate layers for the character and background. Then I paint the form of the shadow of the character. At this stage, I ignore the native color and solely capture the shape of the shadows. It’s preparation for mistreatment the Mixer brushes, anon within the method.
- Add the local colour
Take care to colour according to the lighting
I fill in the colours of her skin and clothing. Because of the edge light, I use a brush on low Opacity to add a little green into the lightest area and a little red into the dark area, to make her look subtly different on both sides.
- Adjust the gesture
Hands are an essential part of portrait painting
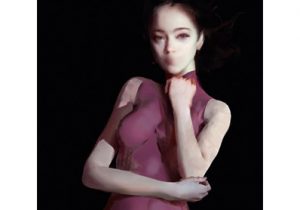
When it comes to portrait paintings, the hand is equally essential as the face. If the face is a flower, then the hand is its leaf. Painting a portrait without the hand in the image would be like showing a flower without the leaf – it’s a incomplete object. So I paint the hand first.
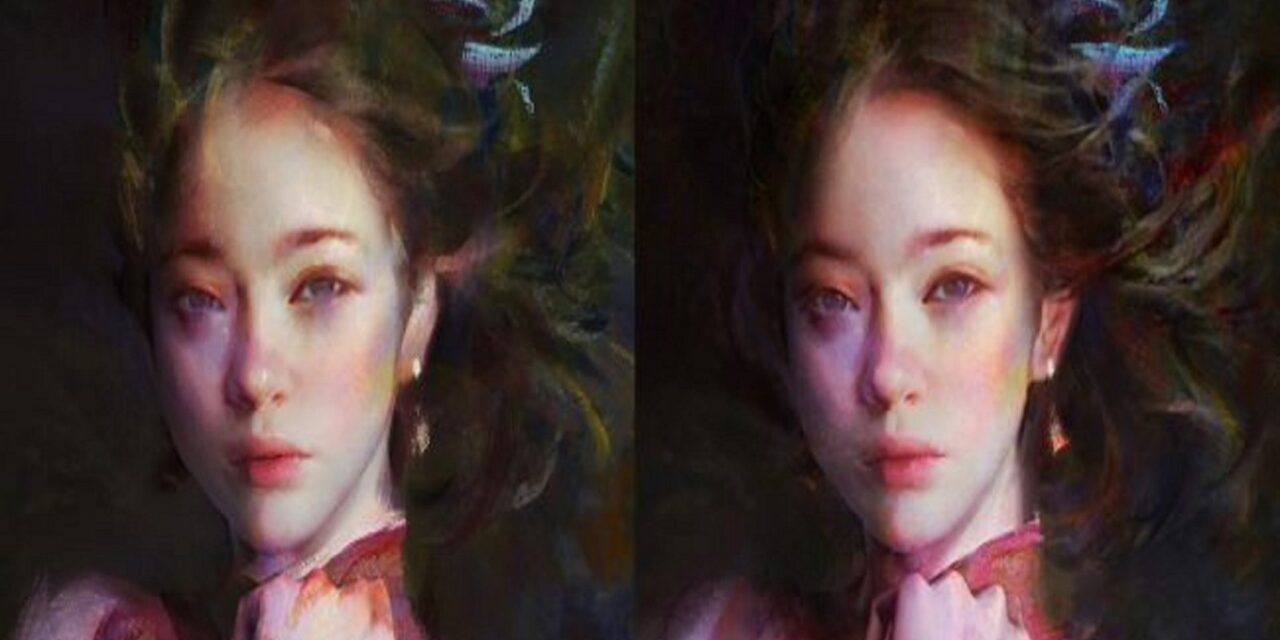
- Use the Mixer Brush
The Mixer brush creates a paint on canvas effect
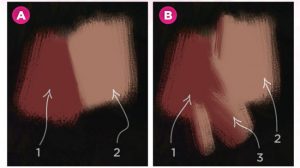
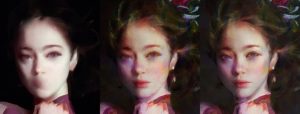
Click and hold the comb icon within the Tool palette, then choose the Mixer Brush and set it to Sample All Layers. this allows American state to select up the canvas color from all visible layers.
Figure A (above) shows 2 distinct colors (1 and 2). By mistreatment the Mixer surface the colors – figure B – you’ll be able to produce a control like painting on a standard canvas (3). mistreatment varied combos of colors and brushes, you’ll be able to reach a variety of real-world painting effects..
- Fill in the background
Advertisement
The brush is tested out on the background
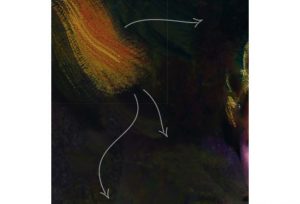
I typically attempt brushes on the background space before drawing characters. during this case, I arrange to use the big Mixer brush to fill the background. Sometimes, the result isn’t what I supposed, and in such cases I’ll cowl the layer with a customary brush instead.
- Illustrate the hair
Advertisement
Cold and warm colours bring the painting to life
I choose a leaf brush to color the hair and therefore the background. I try and add each cold and heat colors to inject a touch of life into the setting, therefore it’s not too stuffy in look. generally I’ll paint the background like AN abstract painting.
- Change the outline
The bottom part of the hand is removed to help refine the shape of the figure

I alter the define of the body, to create the sharp form softer in look. i made a decision to omit the lowest a part of the hand as a result of it’ll facilitate ME to precise the higher portion of the character’s body.
- Introduce facial features
Low Opacity brushes are better suited to painting details
I switch to an occasional Opacity brush to color the face, as a result of the Mixer brush is unsuitable for painting details. My approach is to color a giant egg form, then use alittle brush to color the facial volume, then use a good additional smaller brush to tackle the small print.
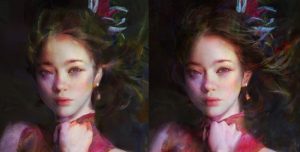
- Preview and check the shape
It’s time to take stock and review the painting so far
By mistreatment the Mixer brush, I made several little shapes and small brushstrokes. therefore I take the chance to review the shape and notice some concepts to complete my work. i exploit these pauses to manage my pace of painting.
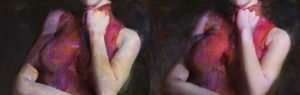
- Adjust the hand position
Colours are removed so they don’t detract from the face

The position of her hand looks incorrect so I adjust it slightly. I change the colour in the arm because I want to reserve any vivid colours for the character’s face.
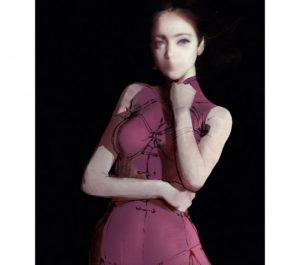
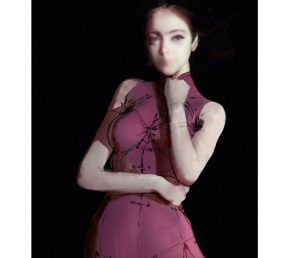
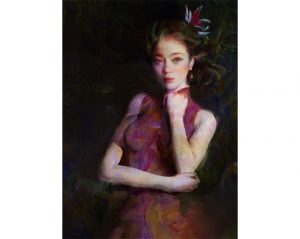
- Vary the look of the character’s clothing
The strong red dress is toned down with cold colours
The colour of the material is that the purest object during this painting. For me, red is that the hardest color to specific. I try and offer most of the red dress a chilly look, solely keeping a robust red close to the character’s arm.
- Adjust the shape around the head
The face is simplified and made less rigid
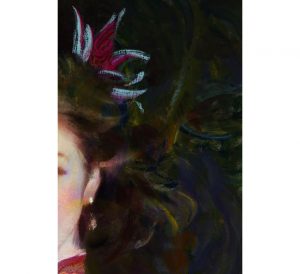
I’m nearing the finish, now. The head is still the primary part of this painting, so I adjust the shapes around the head, to ensure they’re simple yet not stiff. I keep the loose texture on her right side and add a subtle dark colour to mix the hair into the background.
- Finish the portrait
Rough areas help the viewer to use their imagination
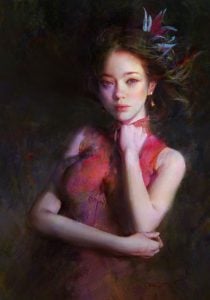
This is my favorite step within the inventive method – and not simply because I’m near to finishing! i favor paintings with a way of visual rhythm. therefore during this workshop, I try and do less particularisation, to make a distinction between the rough and also the labyrinthine. I won’t connect all the small print victimization dark colors.
Instead, I’ll leave some areas to function a link to the encircling tones. This approach creates ebb and flow at intervals a picture, and avoids the entice of a dark painting that simply appearance stiff. The rougher areas can encourage the viewer to use their imagination.
This article was originally revealed in ImagineFX, the world’s popular magazine for digital artists. buy ImagineFX here.


